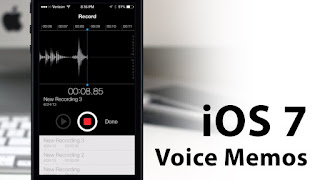
I use my iPhone to record interviews. I also regularly record songs that my band is working on at practice. The iPhone’s native Voice Memo app works great for simple access to the features I need. Of course, after recording something, I certainly don’t want to delete the memo. But I also don’t want to keep it on my device, taking up space. Instead, I sync the memo with iTunes or email it to myself so I can store it and remove it from my iPhone.
If you are wondering how to transfer voice memos from iPhone to computer, or wonder where they went when you synced them, we’ve got a quick tutorial to help you out…
It has been a while since we’ve done one of these basic tutorials, so we want to remind you that we recognize this information is common knowledge to many of you. If you are already familiar with how to move voice memos to your computer and know where they are stored, rest assured that we don’t mind if you skip this article. We feel confident that there will be a number of readers who don’t already know about voice memos syncing and will be glad we posted this basic tutorial.

Transfer voice memos via email
Probably the easiest way to transfer a voice memo is to do so via email. The one problem with that is you can only send one memo at a time, so if you wish to transfer multiple memos, you will have to repeat the process several times, or you can just skip to the next section where we explain how to transfer memos to computer using iTunes.
Step 1: Launch the Voice Memos app and select the memo you want to transfer. Then tap on the Share icon, as seen on the screenshot below.
transfer memo via email
Step 2: From there, you have several options. You can select to send the memo via email, but you can also send it via SMS, or even via AirDrop if you are nearby your Mac. For this tutorial, we select to send this memo via email.
Step 3: A new email will be automatically populated with the memo file. Simply type in your email address, or the email address of your preferred recipient, then send the email.
email memo
How to sync voice memos with iTunes
Exporting voice memos to your computer is a lot simpler than you may realize. It requires you to connect your iPhone to iTunes. There is not much more after that. In the few steps listed below, we will show you how import voice memos into iTunes. Note that the process is exactly the same whether you own a Windows PC or a Mac.
Step 1: Connect your iPhone to your computer.
Step 2: Open iTunes on your computer and select your device in the top header (the icon that looks like an iPhone).
Step 3: Select “Music” from the tab options in the sidebar.
transfer voice memos to computer
Step 4: Select “Sync Music” and then select “Include voice memos.” This setting will extract your voice memos and load them into iTunes.
Step 5: Click “Apply in the bottom right corner of iTunes. iTunes will then sync with your iPhone and download your voice memos to your computer.
How to find voice memos in iTunes
Once you’ve synced your voice memos with iTunes, they will be added as a specific category called, “Voice Memos.”
Step 1: Select the “Music” icon from the top navigation bar in iTunes, then select Playlists from that top navigation bar.
find voice memo in itunes
From there, you can play the memos, but you can also drag and drop them to your computer’s desktop and put them in folders, or share them via email for example.
Finding your voice memos on your Mac or PC
If you have a PC, you can find your voice memos in this folder: C:\Users\(your username)\Music\iTunes\iTunes Media\Voice Memos
If you have a Mac, you can find your synced voice memos here: Macintosh HD > Users > (your username) > Music > iTunes > iTunes Media > Voice Memos.
That’s all you have to do to sync your iPhone voice memos to your computer so you can store them there instead of your iPhone.

Note that if you delete a synced memo from iTunes, it will stay on your device. If you delete a synced memo from your iPhone, it will be copied back on it next time you sync with iTunes again.
We Recommend
how to download email attachmentsHow to save email attachments to iPhone and iPadFinder App IconHow to disable Auto-Correction on MaciOS 9 Calendar teaser 001How to show week numbers in Calendar appiOS 9 Mail app icon full sizeTip: triage your emails more easily by enabling ‘Unread’ folder in Mail for iOS
Related Topics
How to, Productivity, Tutorial
